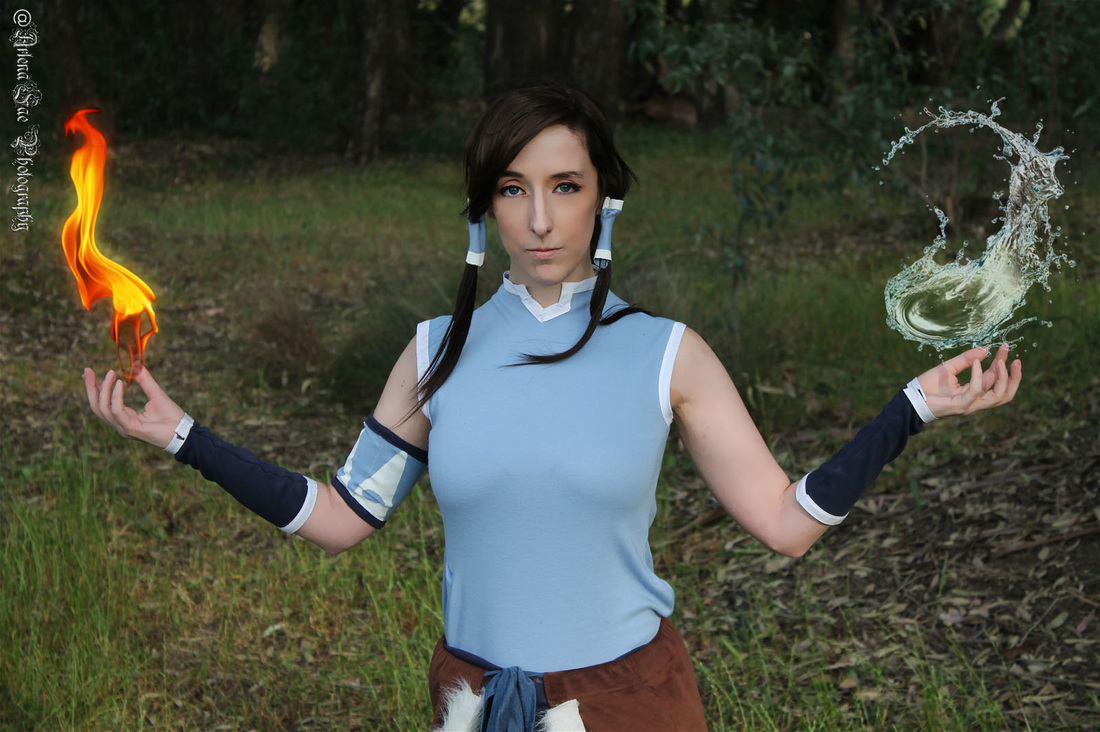
 I made Korra for one of my best friends, Jessica Jeanne. So here's a bit on the process I went threw to make it :) For the shirt, I made a pattern using the duct tape method. I had my friend wear an old shirt that could be cut up, then wrapped masking/duct tape around her (don't use pressure. You don't want it tight!). I copied that onto materials and then sewed it together. I used a stretch, lightweight cotton material for the shirt and put an invisible zipper in the back. The white pieces are bias tape. You can also mod pre-existing patterns.
For her arm bands, I used newspaper to make a simple "pattern"--really just to get the right size and length so it would fit well. make sure the openings are able to go over the widest part of the hands. While the blue pieces were a stretch, lightweight cotton materials, the bias tape doesn't have much give. 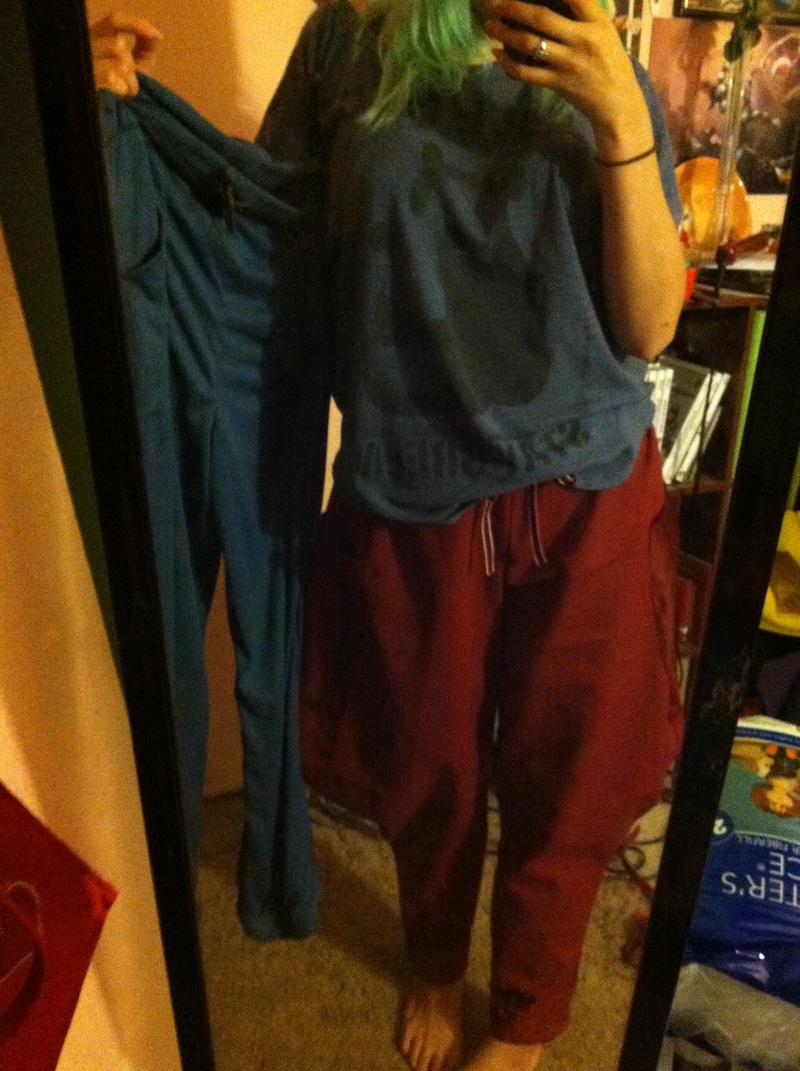 For the pants I used a simple pajama/sweat pants pattern from Simplicity. Just look around for something that's fitting, it should be easy to find. 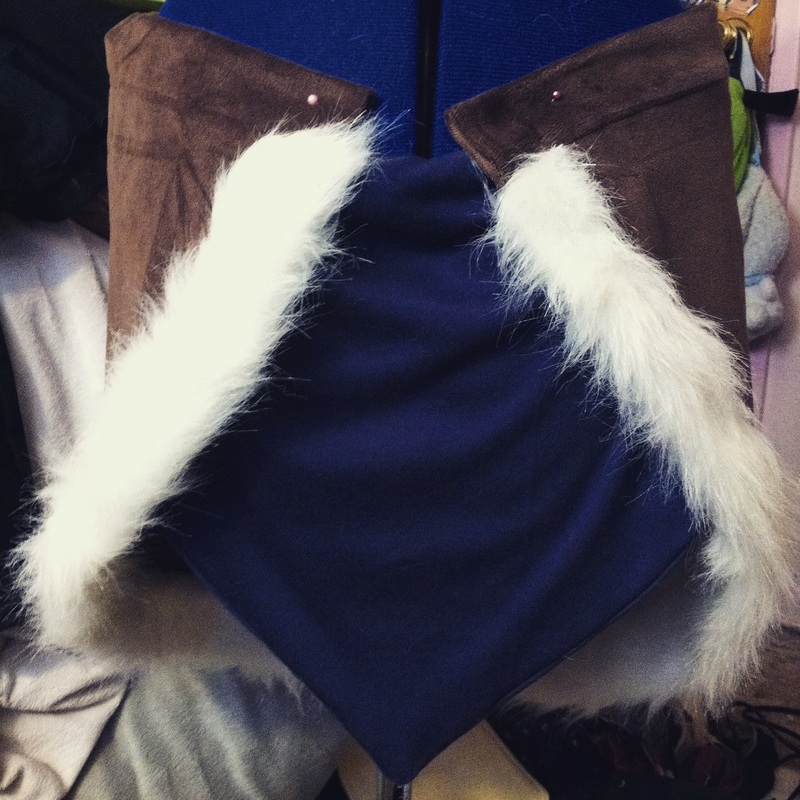 I patterned the skirt with newspaper to get the right shape and size before cutting it out on the fabric. It's basically a large half circle. Then I sewed fake fur around the edges. I'm not sure what the exact material I used was, but it was close to a plush material (something that'd be used for stuffed animals). It was soft and semi-fuzzy. The skirt has a string tie, as well--like pj bottoms and sweat pants. I made the tie from the same kind of cotton material I'd been using. For the blue skirt I cut out two triangles, sewed them together inside out (with a small section left open), turned them right side out and finished sewing it up. I attached Velcro onto the front side of the blue skirt, on either ends of the triangle corners that'd be against the brown skirt. Then I attached a longer strip to the inside of the brown skirt--this way the blue skirt would attach simply by Velcro-ing it on.
The arm band was made from the same type of cotton material the rest of the costume was made from (I used this lightweight, stretch cotton for everything but the lining, fur and brown skirt--it's super comfy to wear and breathable). To add the pattern I used white fabric paint the brand Tulip. To get straight lines I laid down scotch tape and taped paper circles where need be. For this you want to dab on the paint, don't paint it like you would a painting or something because then the paint may get under any lifted parts of the tape or paper and the line won't be as clean. I sewed it together after the paint was dry. Remove the tape once fully dry and before sewing--make sure the tape goes off the edges of the fabric so you have an edge to easily grab when taking it off. And that's how I made Korra. Hope this could be of some use to any future Korra cosplayers out there! :) ~Positive outcomes only! :) 
0 Comments
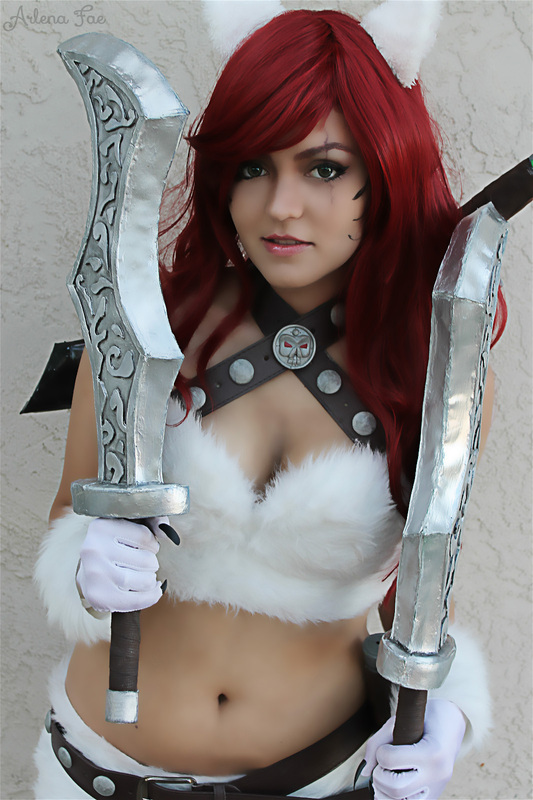
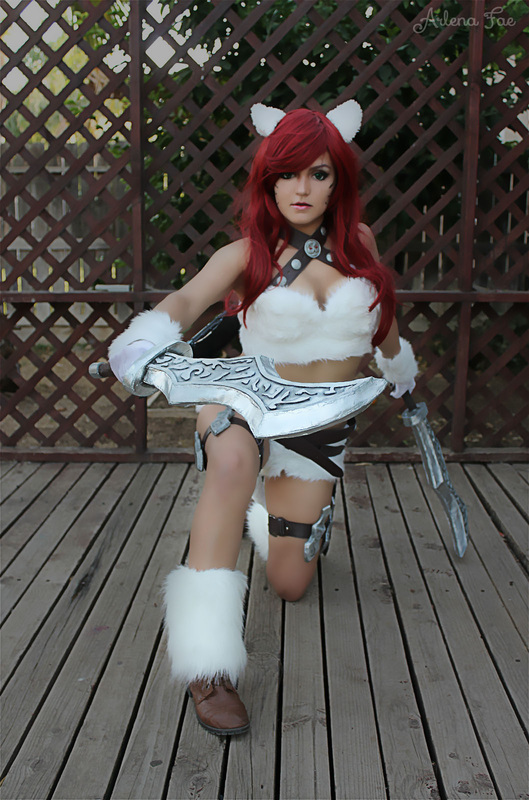
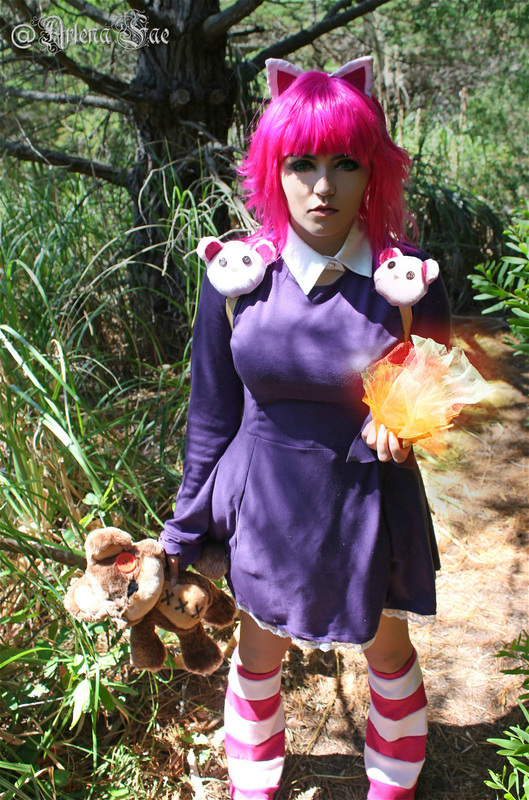 Here's a bit of an overview on how I went about making my Annie (from League of Legends) cosplay. I made her original classic skin, not the new one--I don't really enjoy sweater vests. 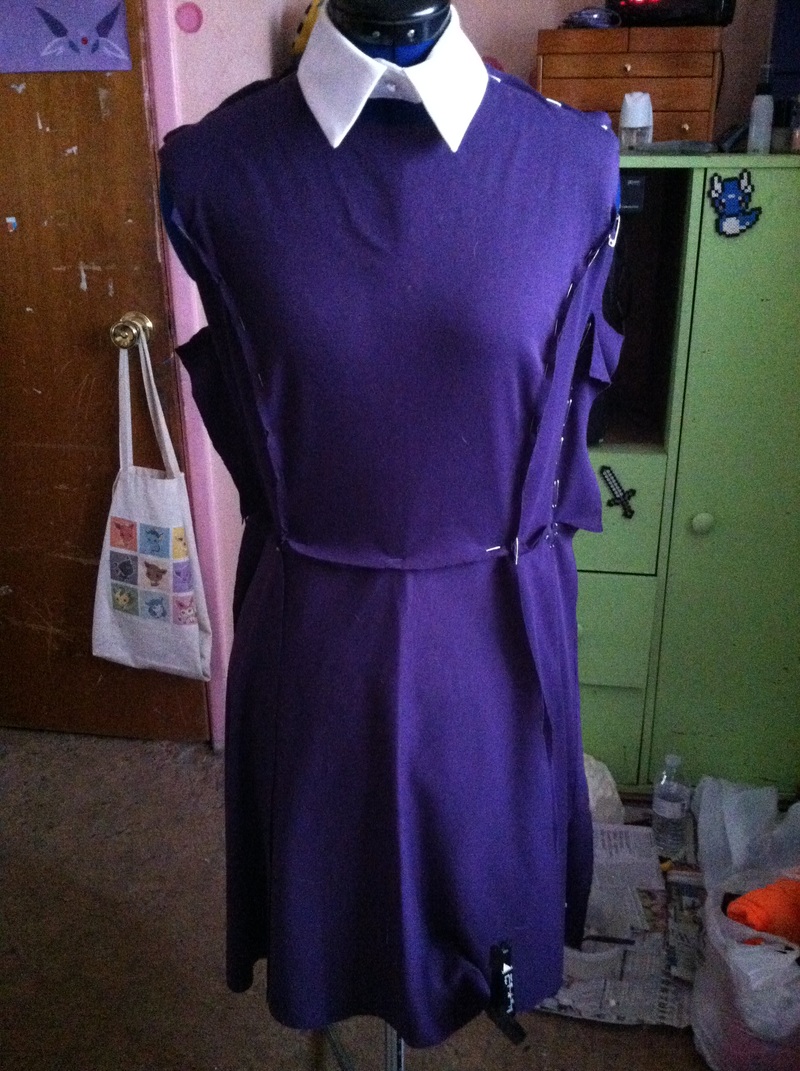 For the dress, I used a pattern from Simplicity. I can't remember the specific one, but just browse around and I'm sure you'll find something suiting. I did mod it a bit, mostly the length and the cuffs. The fabric I used was a type of stretch, lightweight cotton material. For the collar, you could easily just layer the dress over a button up shirt. I had one I ordered off eBay already (it's an accessory sort of thing), so I just used that. 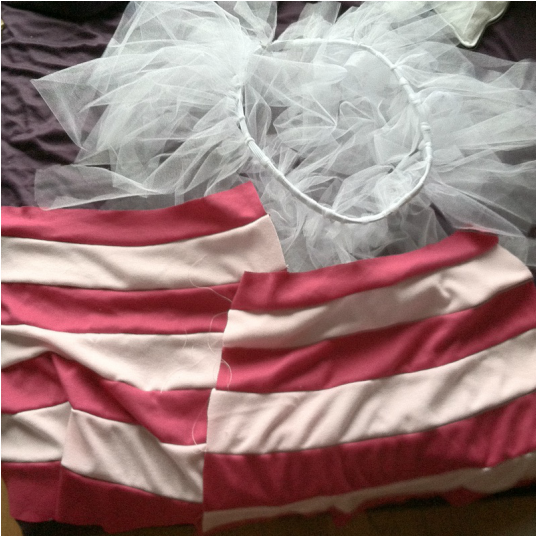 To make the skirt poofy, I took tulle and attached it to an elastic band I cut and sewed to fit me. All i did to attach the tulle was cut long, thick strips and tie it around the elastic band, at the center of the tulle strip (hope that makes sense-you end up getting two layers from that one strip).For her leg warmers, I used two different fabrics and sewed them together in a horizontal stripe pattern. I cut multiple strips of each color about 2 1/2 inches wide--with seam allowance on either side. The very top strip is folded over and has an elastic band sewn inside. The fabric I used was the same as the dress, a comfortable, lightweight cotton with some stretch to it. To make the pattern--so they would have the right shape and length--I used newspaper and created a cone shape around my leg. 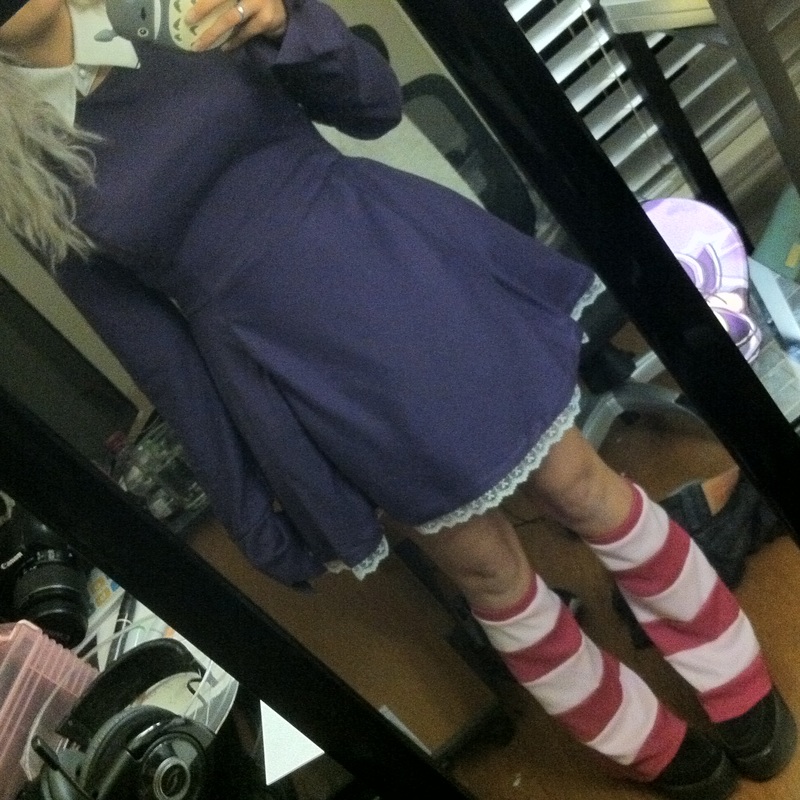 I also added lace around the bottom of the dress. 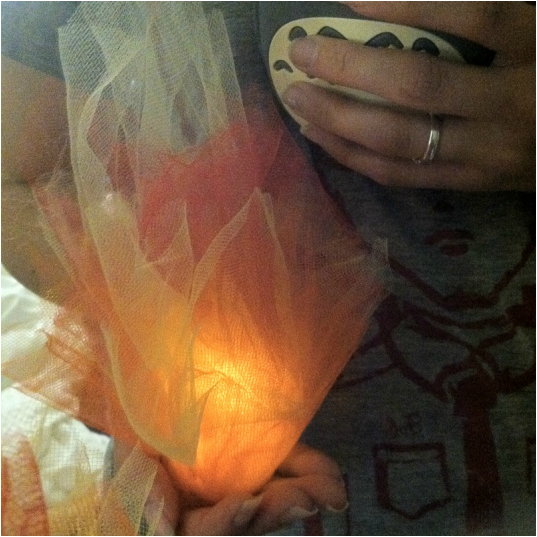 For the fire, I used red, yellow and orange tulle and wrapped those around a battery-powered, flickering tea candle ($1 for 2 on eBay). I cut and shaped it better after it was wrapped around the candle. Just fiddle with it till it looks how you'd like. 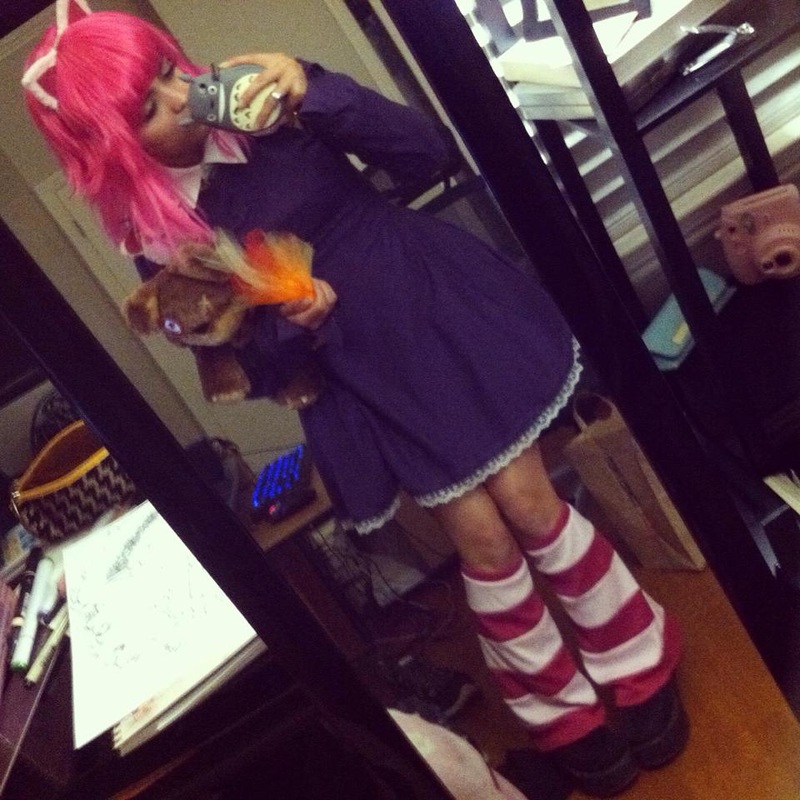 I already owned a cat ear headband, so I traced those ears and made a sort of covering using the fabric I used on the leg warmers. A cardboard base glued onto a headband could work just as well (or stuffed ears). I also made some bear heads using the fabric I used for the leg warmers and attached those to a small, pink backpack I already owned. Tibbers was bough from the Riot store. And that's how I made Annie. Hope any future Annie cosplayers can find this helpful. I also sell some of the accessories, like the leg warmers, in my store! ~Positive outcomes only! :) 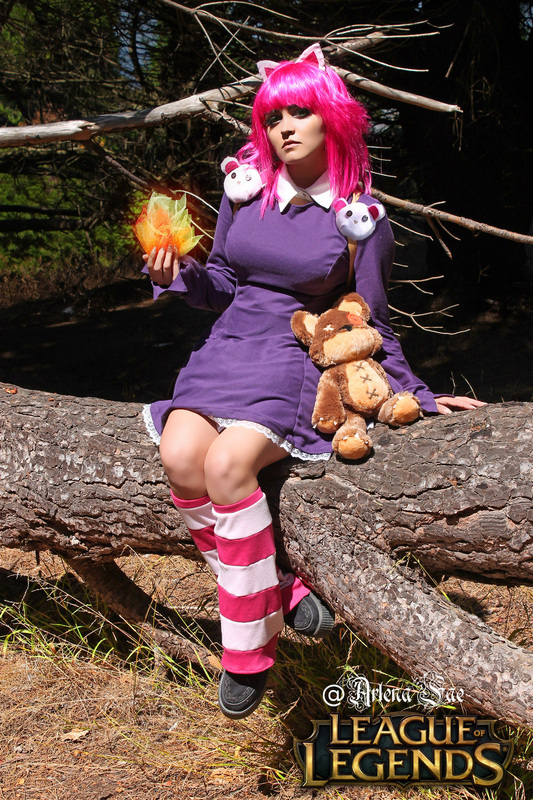 This specific post is for the cosplay (or costume part) only. I'll have another post coming all about how I made the prop. 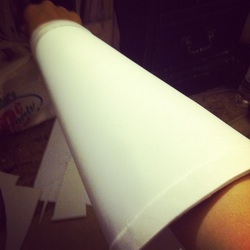 I made the "gauntlet" using craft foam. I used no sort of hooks/clasps/Velcro in order to allow it to come on and off. I made the smaller end as large as the widest part of my hand (when you put all your fingers together--in a cone shape almost). I created a cone shaped pattern using news paper before transferring that to craft foam. 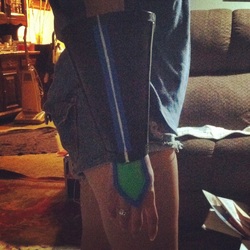 I added details with small strips of craft foam as well. After the shape was finished I coated it in PlastiDip as the primer. 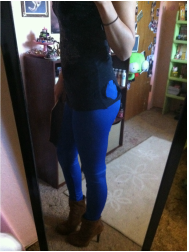 For the pants I purchased blue leggings off eBay. For the shoes I used old boots I had bought at Wet Seal years ago now. I didn't modify any of these in any way. 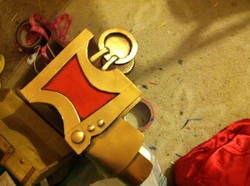 For the shoulder piece I used cardboard to create the basic shape. The two sides and top where all cardboard pieces. The rounded bottom (almost awkward half circles) where craft foam and the side piece that curves in and faces away from the body. On the inside there were a few pieces of cardboard that connected to the different sides in order to give extra support and sturdiness. A thicker craft foam was used to create the gold part on the two side pieces in order to give it dimension. So the red part was the cardboard itself and then the gold bordering that was thicker craft foam. The circles and "pipes" where made using EVA foam (small puzzle-like mats). I cut out a circle then outlined it using strips of the EVA foam and made the pipes the same way. All my craft foam pieces where glued together with hot glue (and any pieces that I felt needed to hold a bit more weight I glued using super glue). On the back of the two circle pieces I place Velcro squares that would attach to the Velcro pieces I sewed onto the jacket. For the nuts and bolts I used different sized googly eyes. This piece was primed using wood glue. And painted with both acrylic and spray paint. I can't really explain how I created the shapes I did. It was done by eyeballing it until I was satisfied and trail and error.  For the chest plate, I took an old bra and added craft foam detailing. Then I created the larger bottom piece out of craft foam, added detailing and attached that to the bra using hot glue (I attached it while wearing it --obviously I did it carefully). Once that was done, I primed everything (even the fabric part) using PlastiDip and spray painted it. I used spray paint for both the red and gold, so in order to keep the gold paint from getting onto the red areas, I covered the areas I wanted to stay red completely in painter's tape. Once the tape was secured and everything I wanted was covered I went ahead and painted the gold parts. After that dried, I could easily peel off the painter's tape.  While wearing the chest plate I patterned the belt using the tape+foil/plastic wrap method. Marked my pattern and cut it out. Then transferred that onto the fabric and cut and sewn that. 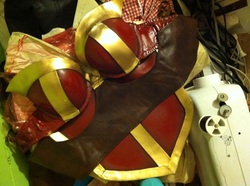 I attached the belt to only the chest plate (so not the bra band) using hot glue along the top and bottom only. 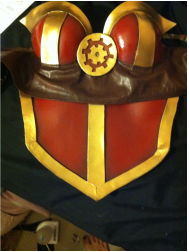 I created the center piece using craft foam, primed it with wood glue and painted it with both acrylic and spray paint. I attached that with hot glue as well. 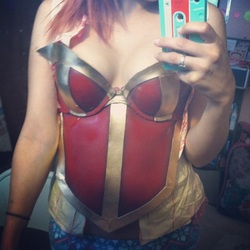 I patterned my jacket before attaching all that. I patterned it using the tape+plastic wrap and then continue to add to it while wearing my chest plate. The way my chest plate and jacket works it, the bra band goes under the jacket while the belt part goes on top (this is why I did not glue the belt to the bra band). The jacket only attaches and meets in the front at the bottom half, the top part was designed to be completely open (almost in a u shape) at the chest then begin to meet or close more near the neckline (reference other photos). 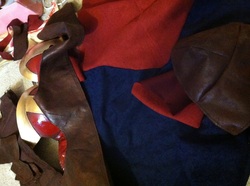 I used a velvet-like material to create the red and blue parts of the jacket. For the brown I used a kind of fake leathery material. For the inside of the collar I used a fake wool-like material. The shoulder piece was made using one long rectangular piece and two curved triangle pieces. The two triangle pieces made the top section and the rectangle made the bottom (this shape allowed the piece to curve over my shoulder). As for more about the jacket shape. I eyeballed it and altered the pattern I made as needed. It was trail and error so I can't exactly explain all the different shapes that went into it. Look at reference photos often to see where different lines fall and colors are since the jacket is made out of multiple colors and materials. 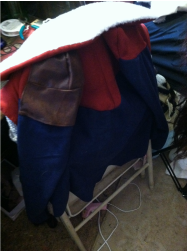 The front part of the jacket (at the bottom) over lapped so that I could have it close using Velcro. I also attached a piece of clear elastic to the front top pieces (the points that begin to come back in above the chest) so that they stayed rested in place. I attached the collar last. I attached the inside wool piece onto the collar first, before attaching the whole collar onto the jacket. 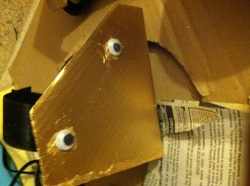 For the knee pieces, I was lucky to have these cardboard pieces that came off of a frame I recently purchased. I only had to readjust how open the where (so that it'd fit around my legs). I used googly eyes for a nuts and bolts effect. I used strips of Velcro that wrapped around my leg to attach all the leg pieces.  The bottom two leg pieces where made using craft foam and primed with PlasticDip. I used spray paint to paint them. The shape was this curvy "I" shape almost (look up reference photos or the game model for better ideas). 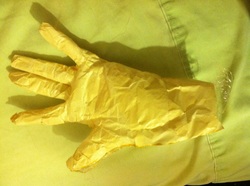 I didn't own any glove patterns at the time so I made one using the same plastic wrap+tape method I had been. There are other ways of making simple glove patterns though. For the left glove I made the "metal" piece using craft foam and looking at the game model/splash art as reference for the shape. I primed it with wood glue and painted it with spray paint. For the belt I created the belt buckle with card board and glue it onto an old belt I had. I didn't own a heat gun at this time but I would recommend using one. The leg pieces for example, didn't keep the shape I wanted. Had I used a heat gun (or a similar method) I would have been able to mold it to custom fit around my legs better and it would have kept it's shape. 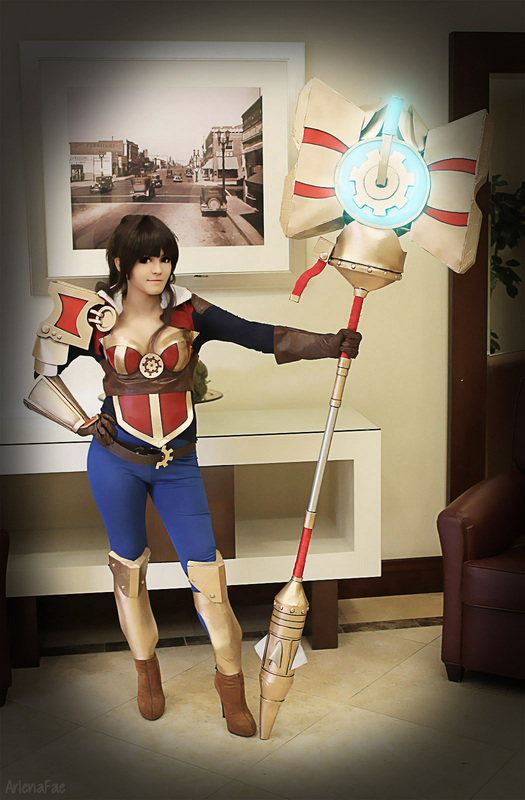 For the fur I went to a local craft store and found fur ribbon, so that's what I used. But fur fabric could work as well. (Keep in mind this is fake fur of course). 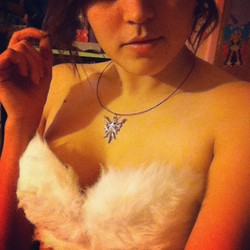 To create the top I took an old bra and basically just glued on the fur all over it (while wearing it so it would be stretched to the size needed). I also left the back able to be re-clipped ~but only slightly, since I later went and wrapped 2 lines of the ribbon under the bra line and attached to the bottom of the bra. 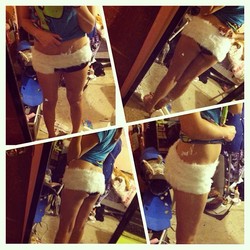 I did the same thing for the shorts. Glued on fur while wearing the shorts so they would be stretched to the size needed. The base of the shorts wear spandex black short-shorts. Be careful when gluing the fur if wearing it so you don't get it stuck to yourself nor burn yourself. I used super glue but hot glue could work as well -it just may not be a lasting costume. 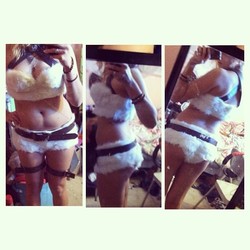 I ordered a few large brown, faux leather belts of eBay and cut those up/figured out placement. For the belts around the thigh I used two belts -this way I would have a buckle on both legs. Then I just measured it out and cut it with a little bit of leway and punched new holes. 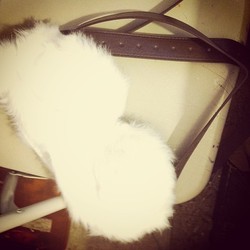 For the belts on the top I super-glued them to the back. In order to get in and out of it, I had originally safety pinned the front parts of the belt -but that was a pain, so I eventually just would super glue me in and pull it off to get out (it never tore the fabric, just a bit of the "skin" of the belt but it was never seen since I always glued it in the same part). I didn't keep the buckle on these -that could work to make taking it on and off easier though (I just didn't like how it looked, personally). 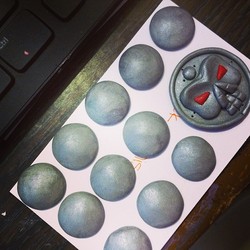 To make the pendent and "buttons" for the belts I just used polymer clay. I used a reference photo to sculpt it out and baked it according to the directions on the packaging. 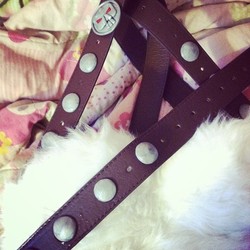 Just glue those on using super glue. 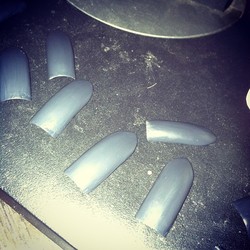 For her gloves, I added my own little touch. I was debating against adding the nails inside/on my own fingers -then the gloves would just look pointed at the fingertips- or attaching them on top of the gloves. I ended up attaching them to the top of the gloves. I used super glue to attach them and wore them while doing so to figure out the placement. I don't have any photos of the rest of these steps. For the gloves I just ordered long elbow length, white gloves off eBay -made of some satin-like fabric and cut it to the length I wanted. Then I glued on 2 strips of fur at the ends -using the widest part of my hand as a measurement (so I could slide it on and off). I already owned the ears and tails. They were a part of a set I had bought at the previous Anime Expo. I also already owned the boots. I just used brown, lace up boots (semi-combat-like). The wig was from eBay. I cut and styled the bangs. The fluffies (around the ankles/lower legs) are from eBay. I have a haul video on my YouTube that links to a blog post where you can find all the links. I also have a previous blog post on how I made all her weapons/props. 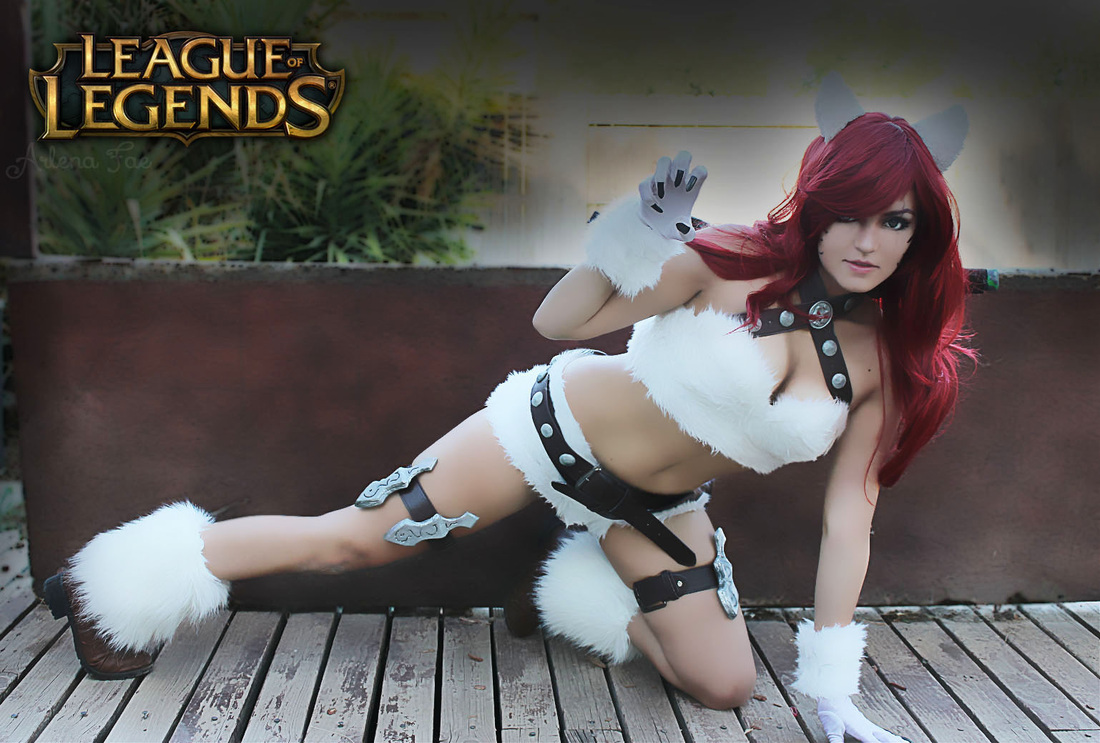 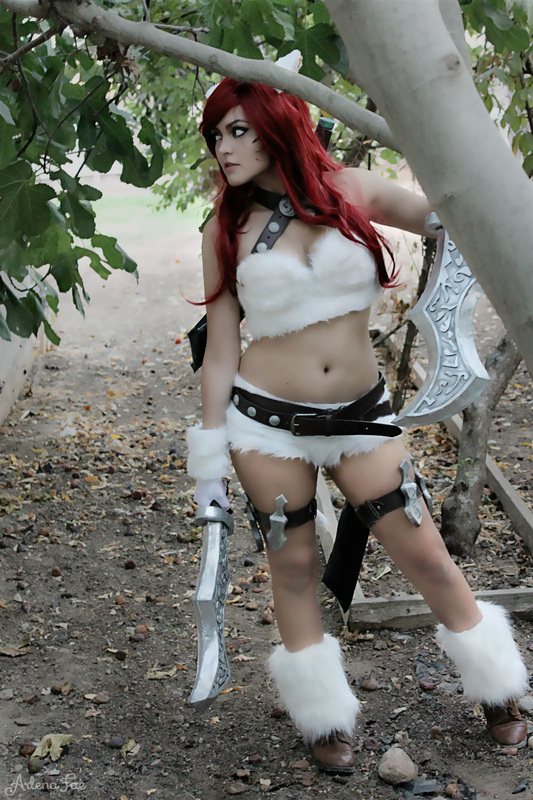 This was as best as I could explain my process of making Kitty Cat Katarina. Hope you all can understand well enough and that it helps with any future cosplay plans of yours.
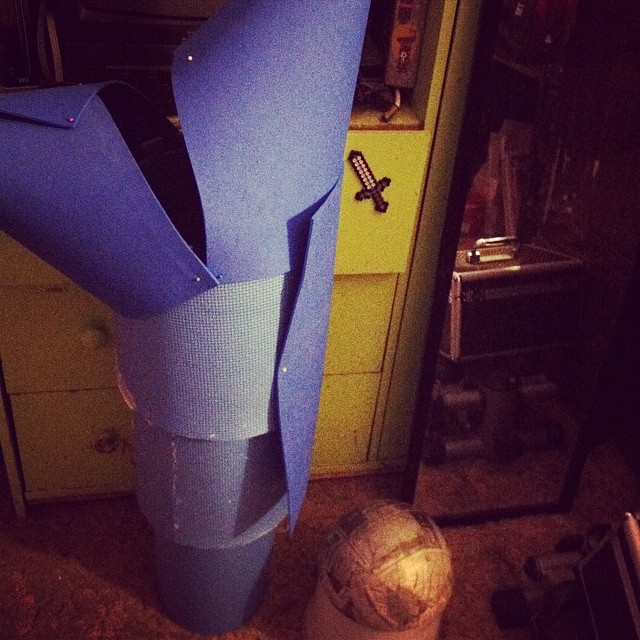
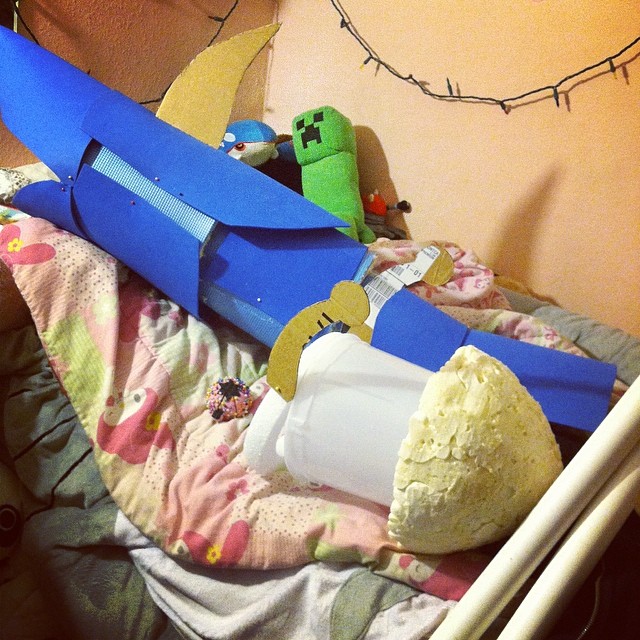
~Positive outcomes only! :) Unfortunately I never took progress photos for this. These were also the first props I ever made. So they're not perfect, nor very good. I'll explain what I would've done differently as we go along. 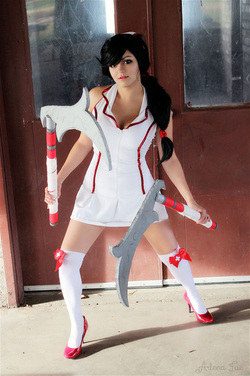 For this I used thick foam poster board and Styrofoam posts. I traced and cut out the shape onto the poster boards to create the blades -use a reference photo to figure out the shape. I wouldn't say poster boards were a bad choice. They worked out fine. Of course, worbla or expanding foam may work better and offer more dimension. I could have also used craft foam or carved the detailing on the blades. 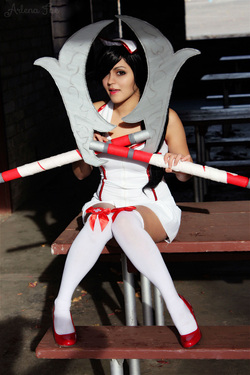 If I were to go back and redo the handle I would've used PVC pipes. But, for the handle, I used a Styrofoam post I found at the local craft store. It wasn't typical Styrofoam though. This wasn't full of many pores (at least on the outer layer/surface) -so it allowed for an even (but rough) look once painted. If I were to go back I would've have primed it before painting. If using the Styrofoam and not PVC, I would've paper-mached it for a more smoother texture and too fill any holes. I did attempt to give it more dimension by creating slight indents around the handles where the rings of color were (the silver rings). After that I simply painted it all using a paintbrush and acrylic paint. To finish it off I used only white fabric I had laying around then wrapped and glued that around the handles. I also glued the blade and handle together. I believe I used super/crazy glue for this (do not use hot glue on Styrofoam). If I were to go back and redo this I would've used better fabric (the one I used was fleece/felt like) and would've shaded and highlighted the weapon to finish it off. This prop did not last long. It only lasted a few days worth of use. I wore this costume for Halloween a few years back and it lasted that night and had to be touched up before shooting this cosplay.
Daggers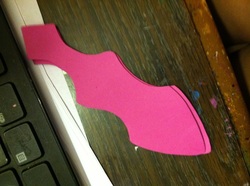 I made Katarina's daggers completely out of craft foam. Now I will note these aren't 100% perfect, nor the way I would've liked them to turn out, but with what I had to use and the time I had left (I procrastinated) it's what I could do. I'm still happy enough with them though. 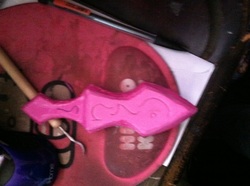 I drew the basic shape of the daggers onto a piece of paper, then traced it onto a thin sheet of craft foam -I made 6 daggers and layered together 5 pieces of these shapes for each, so about 30. Cut those out. I drew only the bottom half of that shape 6 more times onto what I had left of a thick piece of craft foam. I glued the 5 thin pieces all together and tried my best to cut it all the edges at an angle, so that the middle piece would be the longest point-like a blade. Then I cut all the edges of the thickest piece of craft foam at an angle -it would've looked better had I cut them at even more of an angle than what I had. Glue that onto the top of the 5. Using a reference photo, I traced out similar designs as on Katarina's daggers, onto the front of mine. So note, I originally used magnets to attach the daggers, small circular ones. So at this point, I outlined the shape onto the center back of each dagger and cut out about 2 layers (of the 5 thin pieces of craft foam). I'll mention now, the magnets worked fine, but for larger cons I wouldn't recommend, while they held fine when moving about they would've easily had gotten knocked off if hit against something/one. I ended up super gluing them for the con, but either a stronger magnet or attaching belt-like holders would've worked as well. 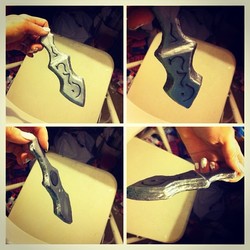 After this I primed them (with wood glue), then spray painted them with metallic silver spray paint (acrylic paint would work too). Now shade and highlight (I used oil paints to do so, but acrylic would work as well). Lastly, I glued the magnets onto the back of the dagger and spots on the thigh-belt where I wanted the daggers to sit. Swords/Blades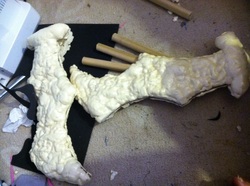 For her swords, I used expanding foam, cardboard, craft foam, fabric, and wood. To start off I traced the shape of her dagger onto a piece of cardboard then (make 2). I covered one side of both of them in expanding foam, let that dry then do the same to the other side. I also took a long thing wooden post (from Walmart) and cut that into the appropriate size -this is up to you. I had no exact measurement, I just eye-balled it and went with what looked right. 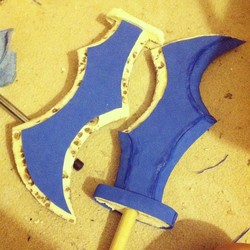 Once everything was dry, using a knife (I believe it was a steak knife-one with teeth) and a box cutter, I started shaping it. I cut off all the excess around the sides of the cardboard, then angled both sides so that they would come to a point where the cardboard was- think like a blade. Of course, I kept that oval part at the bottom wider than the blade. I also flattened out/evened the top of each half. Use a reference picture to figure out the exact shape of everything. I then took pieced of craft foam and covered the sword. You can see some of the shapes I cut of craft foam here. I also took another small piece of craft foam and wrapped a strip around the bottom of the wooden post. To attach the wooden post, I outlined the size after figuring out where I wanted it -centered as best as possible- and cut out about an inch or so, then glue it in place (with super glue, hot glue and wood glue -I wanted it to stay). 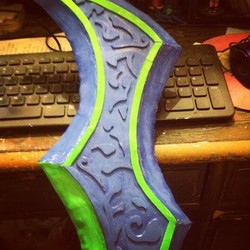 I took thin, long strips of craft foam and glued it around the edge of the top part of the blades-like outlining it. Using a reference photo, I traced out shapes, that looked similar to the design in the photo, onto a piece of paper and used that to trace the same shapes onto craft foam (4 times). Cut those out. To figure out the size, I just would eye-ball it then place it onto the blade and change it as needed (when using the paper). Glue those in place. It should look the same on all 4 sides. 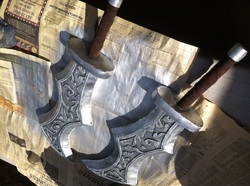 Now prime and spray paint everything. I used metallic silver paint. Once everything was dry I when ahead and cut out long strips (ribbon could work too) of brown leathery(semi-velvety but not ~I don't know the name of the fabric) like fabric and wrapped it around the wooden handles. Glue it into place -so glue it at both ends and randomly around the middle. Using oil paints, I shaded and highlighted everything. Other SwordsI don't have any real good photos. But as for the swords on the back and side: I made those literally the day before (super bad with procrastination!). Sorry to say, but I just ran to the $1 Store and bought some foam swords in a shape that I liked -I was lucky to find the exact shape and size I wanted (had to go to a few different stores). I used black electrical tape to wrap the blade part -it gave the effect I wanted. For the handled I used the same fabric as on the other two swords (^ up there) and painted the very end a metallic grey. Had I had more time (and money for more expanding foam), I would've used the same technique as I did for the main swords -cardboard and expanding foam- and used this same shape. Still probably would've wrapped it with electrical tape or fabric since, according to the reference photos I had, they looked sheathed.
And finished! Hope I could help and that my explanations were good enough >.<
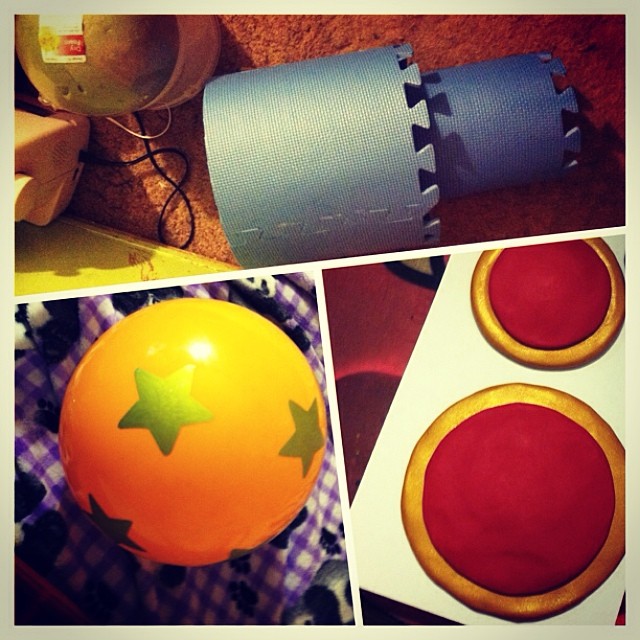
~Positive outcomes only! :) Here's how I made Pow Pow, Jinx's mini gun from the video game, League of Legends.
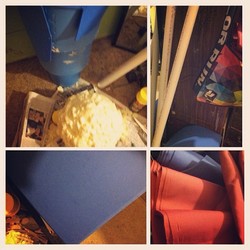
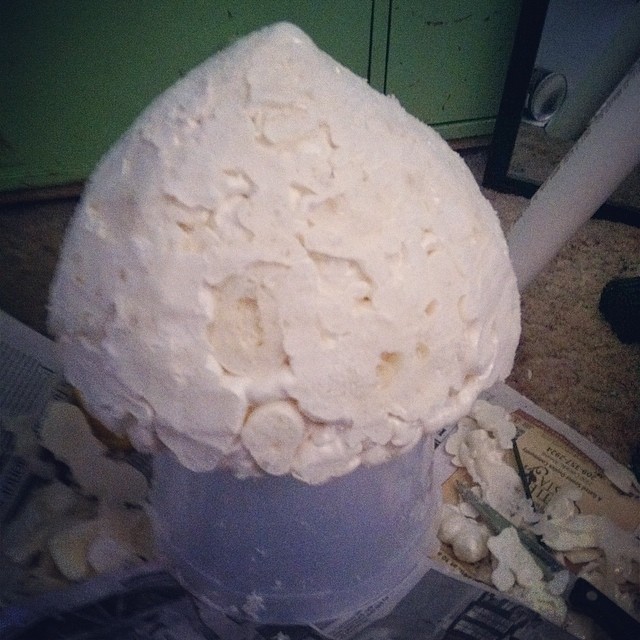
For the base of the end I took an old ice cream bucket and removed the handles. I also picked up a dome/half circle of floral foam at Walmart. 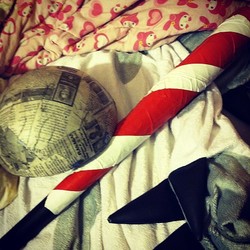 Floral foam is easy to break and crush and very fragile. So using it as is isn't a good idea. In order to make it sturdy I wrapped it in quite a few layers of paper mache and let that dry.
The reference photo I used and preferred had a funnel shape look for the end of her mini gun. In fact, a person who made that design said they used a giant funnel. Since I couldn't find a large enough funnel I used floral foam and expanding foam. I first attached the floral foam onto the bottom/underneath of the bucket using hot glue and super glue. Then I covered the floral foam in expanding foam adding more to the top rather than the sides. After that dried I used a box cutter and steak knife to give it the shape I wanted. If you're wanting to get the shape of how it is in a majority of her photos and game model you could easily follow the same steps and shape it more squared and angled with the steak knife and box cutter. Cardboard could even be used instead. Paper mache that once it's done.
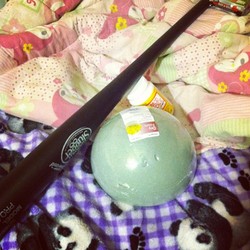
For the handle toward the front I took a Styrofoam disk with the center cut out and covered it in a few layers of paper mache. For more information on how to paper mache refer back to my How I Made Fishbones post. 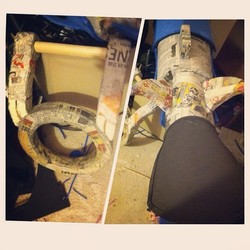 For the handle part of that piece I cut out the original shape in cardboard. Then covered both side (one side at a time) in expanding foam and shaped it once both were dry. Paper mache that. Next I cut a piece of a wooden post to a tiny bit longer than the length of the Styrofoam disk. I carve out a shallow notch, in the shape of the ends of the wooden post, into the sides of the handle and glued it in there using both hot glue and super glue. Now that the actual handle is finished, I attached that entire thing onto the Styrofoam disk with both super glue and hot glue. If you want even more security and nut and bolt on both ends could work too. 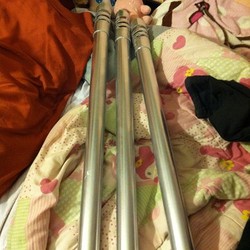 For the barrels I made the ends using craft foam but first cut out a pattern using just normal paper. I didn't have access to any, but it's recommended to use a plastic primer for spray paint before painting the barrels. Once you're ready spray paint it with metallic paint. Since the ends are pink I later went and wrapped a sheet of paper around each barrel just under the craft foam part and then spray painted it. Remember to seal all craft foam pieces with before hand. For the rest of the attachments I used a mixture of craft foam and expanding foam. For other two pieces that go around the barrels I used crafting foam. I cut out a circle then places the pvc pipes ontop of that and traced 3 smaller circles into that then cut it out -this makes sure it'll fit right around the barrels. For the handle at the end of the mini gun I used a card board cut out of the shape I wanted and cover it with expanding foam, shaped it and then covered it in paper mache and attached it with super glue and hot glue. I did the same for the small hook-like piece that comes off of that. The vent-like design on the side is made from crafting foam as well. I first cut out the pattern on a normal sheet of paper then traced it onto crafting foam, cut that out then glued it to the funnel part with hot glue. For the bucket part, I once again used craft foam and cut out little half oval every inch or so across a long rectangular craft foam piece. I used hot glue to attach it. I took all those pieces out and spray painted that. For the front handle I just spray painted the whole thing pink then went back later and used acrylic paint to paint the handle brown and add slight wood detailing. For the bottom piece I first spray painted the entire bucked with metallic grey paint, once dry I wrapped that in paper and spray painted the funnel part with the pink paint. I'd later go back and use an orangey-yellow color for the cut out half oval pieces of the bucket, and using the same technique and paint as I did with the wooden part of the front handle, I painted the back handle. Note: The reference photo I used had wooden handles and the back one looked barrel (like wooden barrel, think root beer or something) shape. 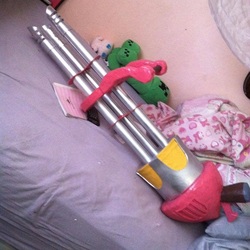 I also cut out a circular piece of craft foam that fit in the opening of the bucket and had 3 smaller cut outs that fit the pattern/shape of the pvc pipes and painted that with the metallic grey. I slide all the pieces onto the barrel then placed them where I wanted them in the bucket and filled it with expanding foam. I used the expanding foam like glue since I knew it'd be the sturdier option for keeping the pvc pipes in place. Keep in mine you're going to have to sit there for 5 minutes holding them as still as possible while the expanding foam sets and then have some set up so you can have the barrels facing upwards, to finish drying completely for the next like 15 hours. I'd later go back and super glue and hot glue all the rest of the pieces on the barrel in place. If you have longer nuts and bolts available to you, I'd recommend attaching those through the bottom of the Styrofoam disk and the two bottom pvc pipes for more security. The ears were cut out in craft foam and painted with acrylic paint. I just attached those with hot glue to the Styrofoam disk. And the bottom piece was made from two identical pieces of cardboard and expanding foam. I covered one cardboard piece in expanding foam, let that dry, cut off the excess around the side then made the top (top as in when it's laying flat on what would technically become the side after it's attached) as even as possible then hot glued on the other piece of cardboard. Then I went around the sides/edges and covered it in craft foam. I also traced out that same shape (as the cardboard) 2 more times in craft foam, only with a center piece of the cut out as well, and glued that onto either side of that piece. Seal that and spray paint it pink and once that dries paint the middle (that was cut out from the craft foam) purple using acrylic paint. Go ahead and attach that to the underside of the mini gun using hot glue and super glue to glue it onto the bottom of the bucked and bottom of the front handle. I shadowed and highlighted everything using oil paints. I'll probably make an entire post on highlighting/shadowing, like where's best later on (or someday xD) but for more tips check the Fishbones post (posted right before this). I used a guitar strap to carry it, making a loop with one end and looping it around the top pvc pipe just behind the front handle and bolting it to the bucket piece on the side that rests against me.  And finished. :) Hope you all enjoyed this post and/or found it helpful.
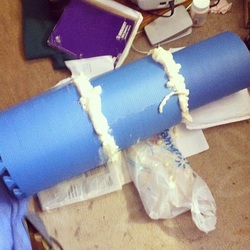
~Positive outcomes only. Here's a little bit on how I made Fishbones, Jinx's rocket launcher from the League of Legends video game. So first I started off by gathering my supplies. I used a lot of different kinds of foam ~craft, EVA, expanding~ and glue ~super, hot~. I bought EVA foam squares (aka exercising mats) and turned those into the base of Fishbones. Most people used a large pvc pip or one long even strand of foam or something else that's sturdy. But at the time of making this it appeared to me that Fishbones had levels throughout it, although it could've been the different sizes of armor on him.  Either way, in order to achieve this look I took 2 squares and formed a circle with them (just by gluing them together it shaped correctly ~same with the rest) to create the first half. I took 2 and a half for the second piece and for the 3rd used a little more than 1. Reminder I was basing this off of the music video version of her, and in the exact paused scene I was referencing, Fishbones looked to be about as tall as she is. All the cosplayers of Jinx I've come across go off of the video game model when it's miniaturized on her back, so if mine is looking over-sized, that's why. I wanted to go all out huge. A rocket launcher would be huge in reality anyways xD.
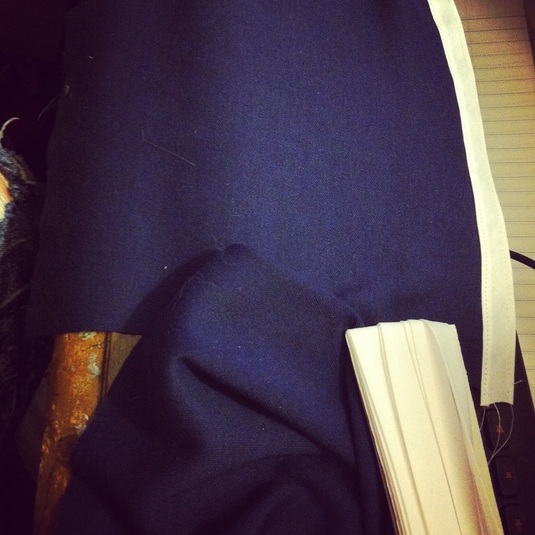
To attach all the pieces together I laid them so that the little "teeth" on the bottom piece of each would lay just after the little "teeth" on the top piece. Basically I just laid them inside each other until it looked about even. Then I placed the bottom two on top of different sized objects (books) to get it so that the piece would lay center with no foam pieces actually touching each other. And then I took a can of expanding foam and foamed all around the lower piece and inside of the large piece (using it like glue but to fill in the gaps as well). Since the foam expanding a lot more in some parts than others, I had to go back through with a knife (or a long bladed box cutter would work) and remove some of the foam (in curved cuts) to let the eva be able to even out and make everything as even as possible. Once I did that I finished it off by removing all the excess foam on the outside (I didn't bother with the inside, that part will be blocked off anyways).
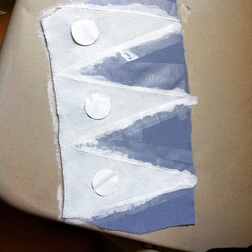
Next, I used craft foam to make the armor pieces. Before cutting anything I laid it out and pinned it (using sewing pins) to the eva foam and drew out a rough sketch of the shape I'd want it at using a pencil (and light pressure!). For the fins and the handle I took a cardboard outline and covered it in expanding foam, shaped it with a box cutter and steak knife, then paper mache-d those. I made the handle larger because I've planned to revisit this and alter the prop when I have money for it. I found a small portable fog machine online that has a small switch box for it so the handle is designed for me to be able to cut out and place the switch box inside of it with the flips sticking out and just poke a hole through the bottom (which means wiring has to be detached and reattached but whatevs :P) and it'll be able to be strung through the prop and connect to the fog machine. I also wanted to wire in lights to the switch box as well. But that's for a later date. In order for that expected mess and the current mess to be nicely hidden I cut out circular shapes out of craft foam, one that'd fully cover the back and fill the hole completely and another for the front that covers most of it but leaves spaces so that the fog could still get through. To attack these I took all the extra teeth that I had cut off of the eva foam from earlier, stacked them up and glued them to be the same height as the 2 different levels and glue them into the props then the circular pieces onto that (it also made the prop sturdier). So that the tails fins at the back would be sturdy when getting knocked around a bit I took thin wooden sticks/post (circular onces) and attached that to the center underneath/inside of each fin with glue. I also used a knife to cut in ridges every so often so it looked like it'd was metal piping or wiring and fit in with the rest of the prop. For the outline of the armor I cut thin (maybe an inch or 1/2 an inch) of craft foam and glue it onto the armor pieces. The teeth where triangle shapes cut from craft foam as well and attached to the head with hot glue.  Before gluing anything onto the base I unpinned it all and took it all off so that the base could be paper mache-d. There's a rough side and a smoother side on this eva foam but I when with the rough side (mostly because for me it didn't matter). In order to paint foam you have to seal with (either with wood glue, or plastic dip I hear works) ~it was out of my budget though either way, but old news paper and .79 cent Elmer's glue mixed with water wasn't! That's how you paper mache by the way. Take either the more expensive mod podge (which I did once because I didn't know ;-; ) or Elmer's (craft) glue and mix it with equal parts water. Paper mache will make some areas a little wrinkle-y though. Just as a heads up. In photographs its an easy fix with lighting and smoothing it in editing but it may be noticable especially when close up a conventions. 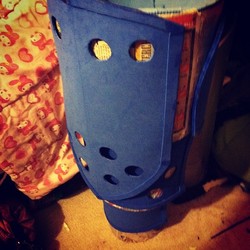 Once that's dry go ahead and attach all the armor pieces. Once that was mostly attached I went ahead and used a box cutter to cut out the holes in the armor. Using light pressure and a cardboard sheet underneath, I made sure I didn't cut through the Eva foam. In order to get even hole sizes I used a spool of thread and traced that lightl with pencil. I eyeball-ed the spacing between each though. I attached the head pieces on, so that they'd be movable, using nuts and bots. It's easy to just poke a screw through the foam so you're going to need a nut at the end of it so that the screw doesn't just slide out and you can tighten it enough to make the head stay in place and not just easily flop back down or fall off. 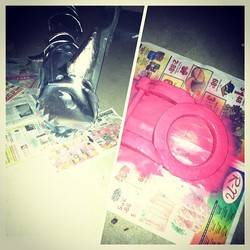 Once that was all done I went ahead and painted all the armor pieces with wood glue to seal it. A smarter quicker (but slightly more expensive way) to coat it is with different sealers (like plastic dip) or spray wood glue ~I already owned lots of wood glue (thanks grandpa!) so I used what I had. Once that's all dried I took it outside, laid down some new papers and coated it twice with metallic "aluminum" colored spray paint.
For the shading and highlighting I used oil paints I bought from walmart. Acrylic paints work too but it dries a lot faster and can be more difficult to blend. Oil paints take a day or two until they're completely dry and are easy to smudge out and blend. I shadowed every ridge, the more underneath something (whether it be a prop or another piece of armor) that more shadow and darker of shadow I made. For the highlighting, I highlighted just a long, very thinnly, along the corners of the ridge of the different pieces of armor. I also took a small amount and blended, blended, blended it along the top curvatures of the head piece and fins. Once the highlighting and shadowing was done I coated once more in gloss-y, non-yellowing clear spray paint. I wanted it to still look metallic and oil paints dull out and matte that areas they're in but the gloss paint fixed that. For the eyes I took a sheet of plastic (a plastic bag jewelry came in ~same material of the bag wigs come in) and painted it. I did this so that the lighting in the future could show through it and make the eyes look like they're glowing that color. ~I actually attached a flashlight (a small one) at the con using duct tape (ghetto??? xD ) and it worked like I wanted :3 Although it wasn't noticeable in the lighting. If you have a brown belt go ahead and use that for the belt around fishbones. I didn't have one to spare though so I just used some belt-like fabric I had and shaped a belt buckle out of polymer clay. Then glued that all on. 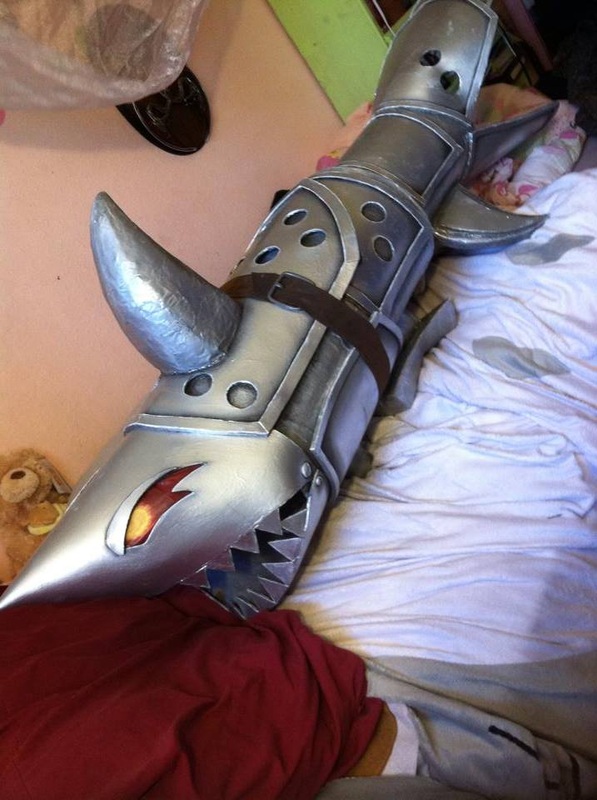 And finished!
I wasn't 100% happy with this. I could do better, especially if I had better material and the right ones. But for what I had to work with I am happy with the outcome. Oh and in order to carry it around, at the convention I attached a guitar strap to the underneath using 2 nuts and bolts (same technique as the head). It turns out this post is a lot more than a little bit? o.O ~Positive outcomes only :) |
Arlena FaeCosplay Tutorials. Hauls & Reviews. Photography. Rambles and Advice. Categories
All
Archives
August 2018
Use the code: "arlenafae" for 10% off purchases at:
http://fashionkawaii.storenvy.com/ |


 RSS Feed
